Pav Bread Recipe / Dinner Rolls Recipe
The pav bread recipe is a classic Indian bread recipe known for its soft and fluffy texture.

Looking for a delicious and easy-to-make bread recipe? Look no further! This pav bread recipe is a must-try for all baking enthusiasts. With simple ingredients and easy-to-follow instructions, you can enjoy fresh, homemade pav bread right in your own kitchen. The best part? It's perfect for pairing with your favorite dishes like pav bhaji or channa masala. Let's get baking!
What Is Pav Bread Recipe?
- The pav bread recipe is a classic Indian bread recipe known for its soft and fluffy texture. It is a popular accompaniment to many Indian dishes such as pav bhaji and channa masala. The recipe combines simple ingredients like flour, milk, yeast, and butter with the unique flavors of Indian spices and seasonings.
- The soft and pillowy texture of pav bread makes it a delightful addition to any meal. Whether you are enjoying it with a spicy curry or simply as a snack, pav bread is a versatile and delicious recipe to try at home.
Why You'll Love Pav Bread Recipe?
- Soft and Silky Texture: The pav bread recipe results in a soft and silky texture, making it a perfect accompaniment to various dishes.
- Health Benefits of Homemade Bread: By making pav bread at home, you can ensure that it is free from preservatives and unnecessary additives, making it a healthier option compared to store-bought bread.
- Customizable Flavors: You can customize the flavor of the bread by adding ingredients such as garlic, herbs, or even cheese, making it a versatile addition to any meal.
- Great for Different Dishes: Whether you're enjoying it with pav bhaji, channa masala, or simply with butter and jam, pav bread is a versatile option that complements a variety of dishes.
- Easy to Make: The recipe for pav bread is relatively simple and easy to follow, even for those who are new to baking.
- Family Favorite: Making pav bread at home can become a family favorite, and the process of making it can even be a fun activity for the entire family to enjoy.
Ingredients for Pav Bread Recipe
- Warm Milk: Adds moisture and richness to the dough, allowing it to rise and bake into a soft texture.
- Dry Yeast: Acts as a leavening agent, helping the dough to rise and giving the bread a light and fluffy texture.
- All Purpose Flour: Provides structure and strength to the dough, creating a soft and airy bread.
- Salt: Enhances the flavor of the bread and helps to regulate the yeast's fermentation process.
- Butter: Contributes to the richness and flavor of the bread, adding a smooth and tender crumb.
- Olive Oil: Helps to tenderize the dough and creates a soft and moist texture in the bread.
How To Make Pav Bread?
Are you craving some soft and fluffy pav bread to accompany your favorite Indian dish? Here's a simple recipe to make it at home!
- Start by mixing warm milk, dry yeast, and sugar in a bowl and letting it sit until frothy. In another bowl, combine all-purpose flour and salt. Then gradually add the flour mixture to the milk and yeast mixture, and knead until you have a smooth and soft dough. Let the dough rise for 2 hours until doubled in size.
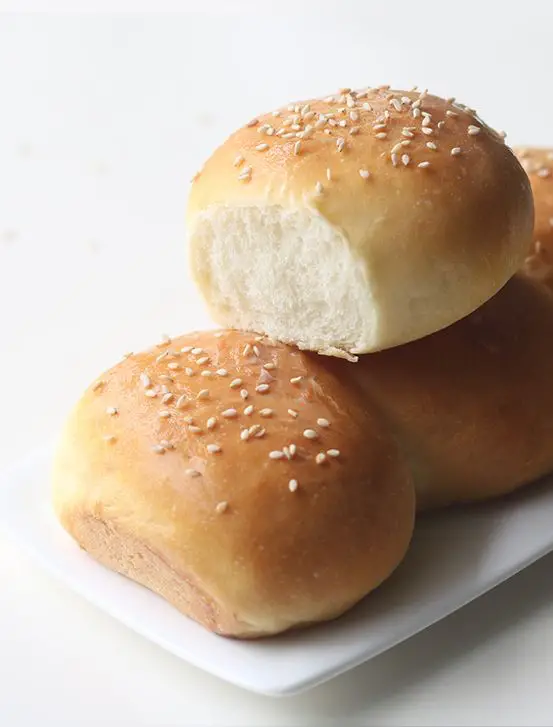
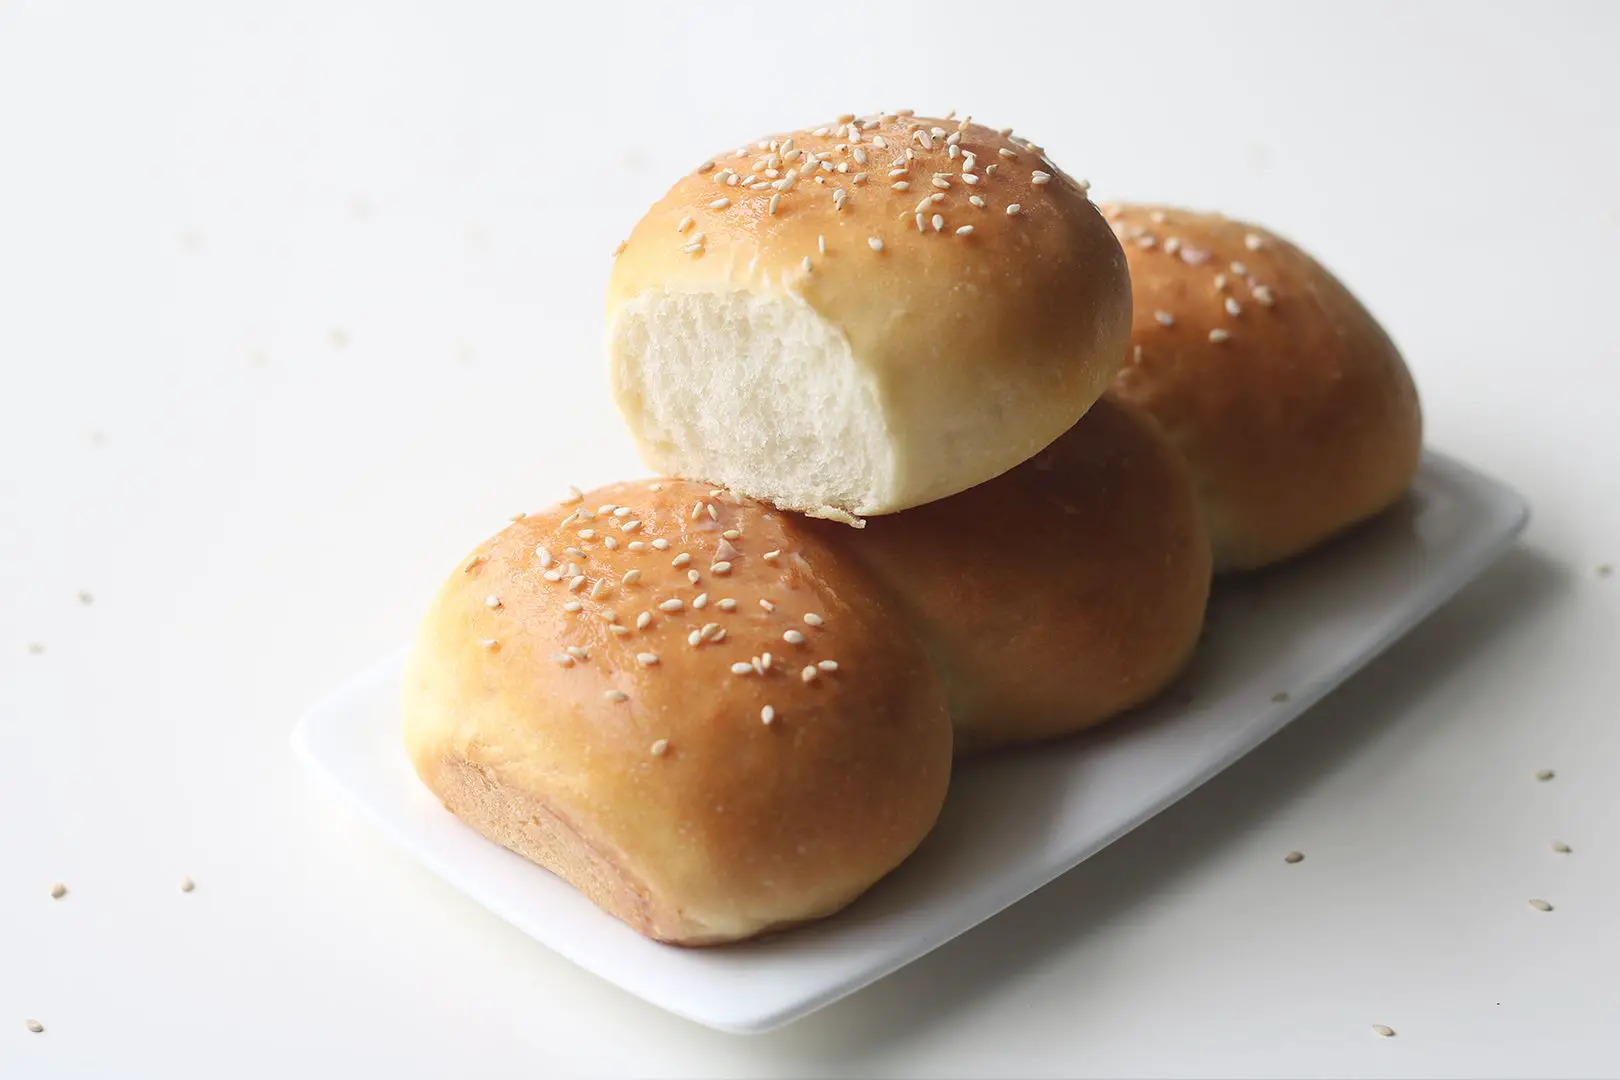
- Afterward, divide the dough into equal portions and shape them into balls. Let them rest until they double in size again. Then brush the dough with milk and bake in a preheated oven until golden brown. Finish off by rubbing with butter and sprinkling with sesame seeds.
- Each step is crucial to achieving the perfect pav bread, from proofing the yeast to allowing the dough to rise. Following these instructions will result in flavorful and irresistibly soft pav bread that pairs perfectly with your favorite Indian dishes. Enjoy!
Serving Suggestions
- Pair with Delicious Sides: Serve the freshly baked pav bread with classic Indian dishes like pav bhaji or channa masala for a satisfying meal. The soft and pillowy texture of the pav bread perfectly complements the flavorful and spicy sides.
- Enjoy with Condiments: Spread some butter and jam on the pav bread for a delightful breakfast or snack. The light and fluffy texture of the pav bread pairs well with sweet or savory condiments, adding an extra layer of flavor to your meal.
- Create a Complete Meal: Use the pav bread to make tasty sandwiches or sliders with a variety of fillings like grilled vegetables, cheese, or meats. The versatility of pav bread allows you to create a complete and satisfying meal for any occasion.
- Perfect for Parties: Impress guests at your next gathering by serving the pav bread alongside a selection of dips, spreads, and toppings. The soft and airy texture of the bread makes it the perfect base for a DIY bruschetta or crostini bar.
- Great for Snacking: Cut the pav bread into small pieces and serve with a dipping sauce as a delicious appetizer or snack. The light and airy texture of the bread makes it an excellent choice for sharing with family and friends.
- Customize and Enjoy: Get creative with your serving suggestions and try pairing the pav bread with your favorite dishes or flavors. Whether you're a fan of spicy curries or creamy dips, the pav bread is a versatile option that can be enjoyed in many ways.
Tips for Making the Perfect Pav Bread
- Preparation Duration: It's important to allow the dough to rise for at least 2 hours in a warm place or until it has doubled in size. This step is crucial for achieving the soft and fluffy texture of the pav bread.
- Cooking Techniques: When baking the pav bread, it's essential to preheat the oven to 180 degrees C and brush the dough with milk before baking. This will help to achieve a golden brown color on the top of the pav bread.
- Importance of Garnishing: Don't forget to sprinkle some sesame seeds over the pav bread before baking. This not only adds a nice flavor but also enhances the presentation of the bread.
- Resting Time: Allowing the dough to rest for 20 to 30 minutes before baking is important for achieving the perfect texture of the pav bread. This step helps the dough to double in size and become light and airy.
- Final Touch: After removing the pav bread from the oven, rub it with chilled butter to get a shiny look. Covering it with a wet cloth will help to maintain its softness.
- Enjoying the Pav Bread: Once the pav bread is cooled, it can be enjoyed with pav bhaji, channa masala, or simply with butter and jam for a delicious treat!
By following these tips and techniques, you can easily make the perfect pav bread to enjoy with your favorite dishes.
Variations for Pav Bread Recipe
- Whole Wheat Pav: Try using whole wheat flour instead of all-purpose flour for a healthier alternative. The taste and texture may be slightly different, but it's worth experimenting with.
- Herbed Pav: Add your favorite herbs like rosemary, thyme, or oregano to the dough for a fragrant and flavorful twist on the classic pav bread.
- Garlic Butter Pav: Mix garlic powder or minced garlic into the dough, and brush the baked pav with garlic-infused butter for a delicious garlicky flavor.
- Cheese Pav: Add shredded cheese to the dough for a cheesy pav bread that pairs perfectly with a hot bowl of soup or chili.
- Sweet Pav: For a sweet variation, add a little more sugar to the dough and sprinkle the tops with a cinnamon-sugar mixture before baking.
- Spicy Pav: Mix in some finely chopped jalapenos or red pepper flakes for a spicy kick that takes the pav bread to the next level.
Experiment with these variations to create a unique and personalized pav bread experience. Have fun and enjoy the process of trying out different flavors!
How to Store Pav Bread Recipe
- Store in airtight container: After the pav bread has completely cooled, store it in an airtight container to maintain its freshness and prevent it from getting stale.
- Refrigerate for longer shelf life: If you want to keep the pav bread for a longer period, refrigerate it. This will help to preserve its softness and taste.
- Freeze for future use: If you have made a large batch of pav bread, you can freeze the extras for future use. Wrap each piece tightly in plastic wrap and store them in a freezer-safe container.
- Use fresh milk and yeast: To ensure the best results, use fresh milk and yeast. Check the expiration dates on these ingredients before using them in the recipe.
- Keep in a cool, dry place: Once the pav bread is baked, store it in a cool, dry place to prevent it from getting soggy or moldy.
- Avoid exposure to moisture: Moisture can quickly spoil bread, so make sure to keep the pav bread away from any sources of moisture to maintain its quality.
By following these simple storage tips, you can enjoy the delicious taste of pav bread for a longer period and avoid any wastage.
Frequently Asked Questions (FAQs)
1. Can I use active dry yeast instead of instant dry yeast?
- Yes, you can definitely use active dry yeast instead of instant dry yeast. Just make sure to activate the yeast in warm milk with a pinch of sugar before using it in the recipe.
2. What can I substitute for all-purpose flour?
- If you don't have all-purpose flour, you can use bread flour as a substitute. Bread flour has a higher protein content, which will give your pav bread a slightly chewier texture.
3. How can I make the pav bread crustier?
- To make the pav bread crustier, you can brush the dough with water instead of milk before baking. You can also bake the bread at a slightly higher temperature for a shorter time to achieve a crustier texture.
4. Can I make the pav bread ahead of time?
- Yes, you can make the pav bread ahead of time and freeze it. Once the bread is completely cooled, place it in a zip-top bag and store it in the freezer for up to 2 months. When ready to eat, simply thaw the bread at room temperature or reheat it in the oven.
5. How do I store leftover pav bread?
- To store leftover pav bread, allow it to cool completely and then store it in an airtight container or zip-top bag at room temperature for up to 3 days. You can also freeze the leftover bread for longer storage.
6. Can I make the pav bread without sesame seeds?
- Yes, you can absolutely make the pav bread without sesame seeds. Simply omit the sesame seeds from the recipe, and the bread will still turn out delicious.
Pav Bread Recipe 2020-08-14 04:21:13
Recipe Card
Pav Bread Recipe
Serves 6
Prep Time: 03:00
Cook Time: 00:20
Total Time: 03:20
Ingredients
- 180 ml (3/4 cup) warm milk
- 1 tsp sugar
- 3/4 tsp dry yeast
- 2 cups (260 grams), divided all purpose flour
- 1/2 tsp salt
- 1 tbsp (15 grams) softened butter
- 1 tsp olive oil
- milk for brushing
- sesame seeds for garnishing
Instructions
- In a wide bowl, add the lukewarm milk (about 100 degree F/ 40 degree C), instant dry yeast and sugar, mix well and keep it aside for about 10 mins or until frothy.
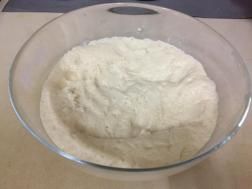
- Meanwhile, in another wide bowl, add all purpose flour and salt, mix well until combined.
- After 10 mins, mix the milk and yeast mixture gently.
- Then add 1&3/4 cups of flour mixture gradually to the milk mixture and knead gently.
- Now add 1 tbsp softened butter and knead the dough until you get a smooth and soft dough (add the remaining 1/4 cup of flour, if required).
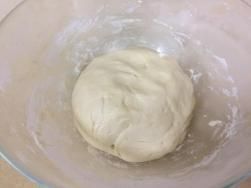
- Knead to the silky and soft dough by kneading for at least 10 mins.
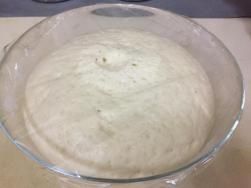
- Then apply 1 tsp of oil over the dough, cover loosely with cling film or kitchen towel or with a lid and let it rise for 2 hours in a warm place or until doubled in size as shown in the picture.
- After 2 hours, punch down the dough and again knead the dough slightly to remove the air incorporated.
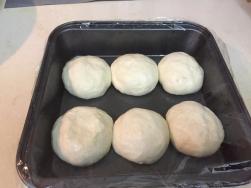
- Divide the dough into 6 equal portions and tuck the dough (as shown in the video) and form a small ball without any cracks.
- Place these balls in a greased pan at some equal space in between.
- Then cover with cling film and allow to rest for 20 to 30 mins or until the dough doubles as shown in the picture.
- Meanwhile, preheat your oven to 180 degrees C.
- Further, brush the dough with milk gently.
- Bake for 20 mins or until the pav/bun turns golden brown on top.
- Remove from the oven, rub with chilled butter to get a shiny look.
- Finally, sprinkle some sesame seeds if you like.
- Also, cover with a wet cloth to get a super soft bun and allow to cool completely.
- Enjoy Eggless Dinner Rolls with pav bhaji or channa masala or even with butter and jam!
By Santhi Therese
The Indian Claypot

Step-By-Step Instructions:
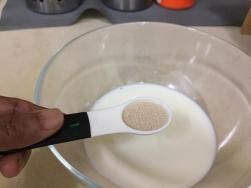
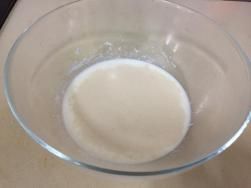
In a wide bowl, add the lukewarm milk (about 100 degree F/ 40 degree C),
instant dry yeast

and sugar,
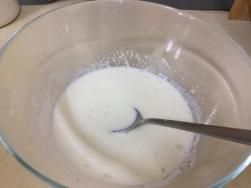
mix well and keep it aside for about 10 mins or until frothy.
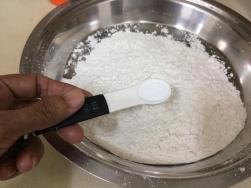
Meanwhile, in another wide bowl, add all purpose flour and salt,

mix well until combined.
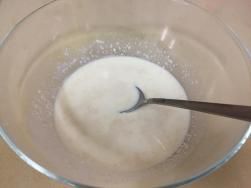
After 10 mins, mix the milk and yeast mixture gently.
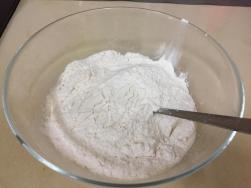
Then add 1 & 3/4 cups of flour mixture gradually to the milk mixture
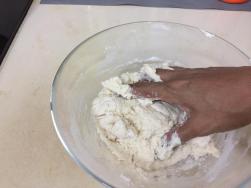
and knead gently.
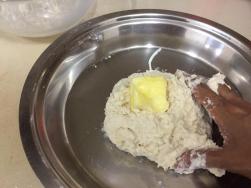
Now add 1 tbsp softened butter and knead the dough until you get
a smooth and soft dough
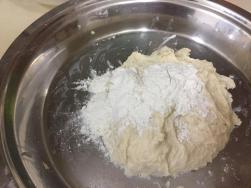
(add the remaining 1/4 cup of flour, if required).
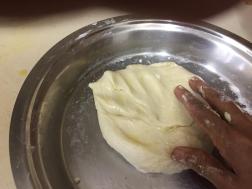
Knead to the silky and soft dough by kneading for at least 10 mins.
Then apply 1 tsp of oil over the dough, cover loosely with cling film or kitchen towel
or with a lid and let it rise for 2 hours in a warm place or until doubled in size
as shown in the picture.
After 2 hours, punch down the dough and again knead the dough slightly to remove the air incorporated.
Divide the dough into 6 equal portions and tuck the dough (as shown in the video) and form a small ball without any cracks.
Place these balls in a greased pan at some equal space in between.
Then cover with cling film and allow to rest for 20 to 30 mins or
until the dough doubles as shown in the picture. Meanwhile, preheat your
oven to 180 degrees C.
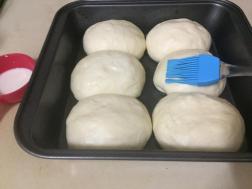
Further, brush the dough with milk gently.
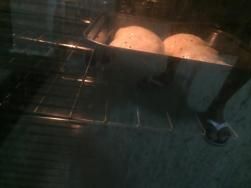
Bake for 20 mins or until the pav/bun turns golden brown on top.
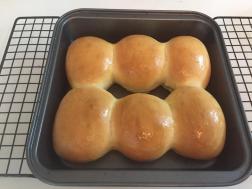
Remove from the oven, rub with chilled butter to get a shiny look.
Finally, sprinkle some sesame seeds if you like.
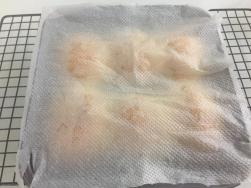
Also, cover with a wet cloth to get a super soft bun and allow to cool completely.
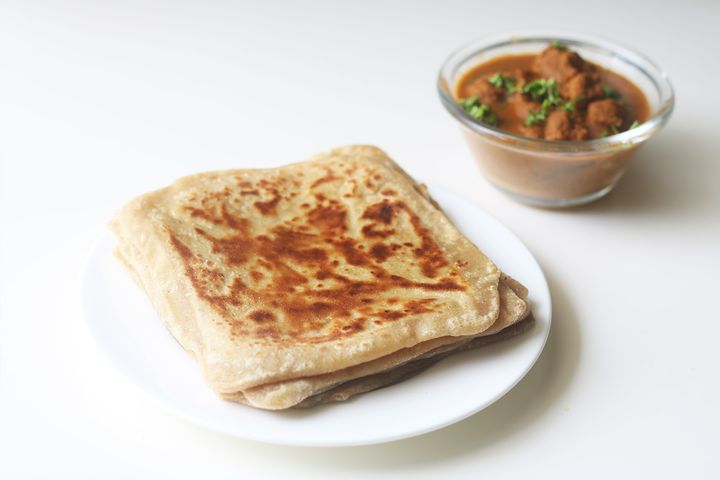
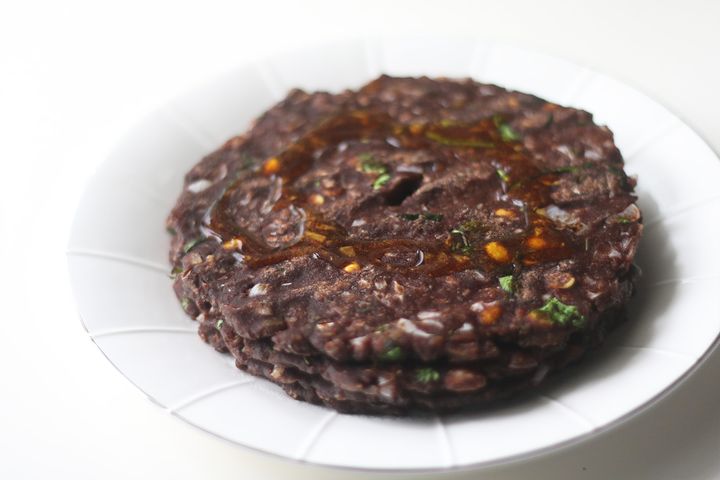
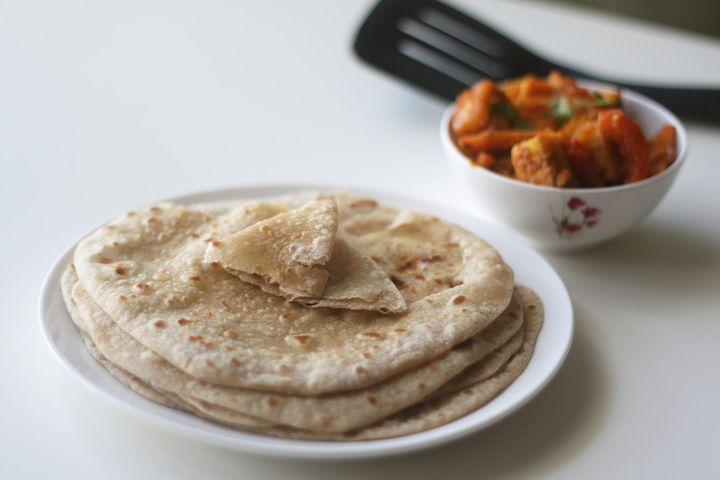
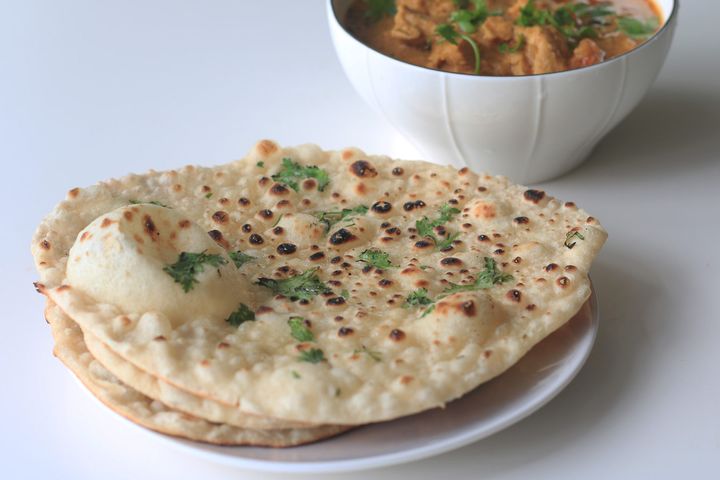
You may also like my other Indian Flat Breads posts and recipes like How To Make Soft Layered Chapati, Ragi Roti Recipe, How to make Soft Chapati, Naan on Tawa, Aloo Gobi Paratha, Paneer Bhurji, Palak Paneer Paratha .