How To Make Soft Layered Chapati
Learn how to make Soft Layered Chapati easily at home with step-by-step photos and video.
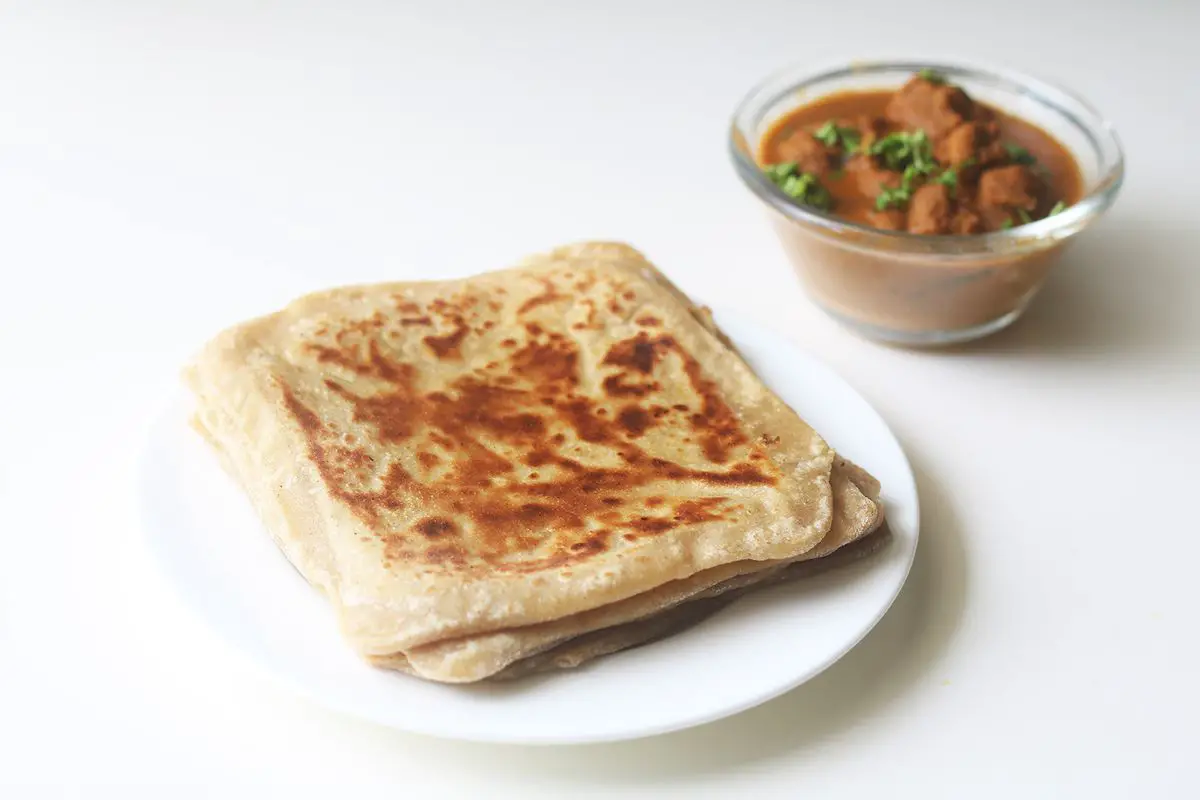
In this post, we will be exploring the art of making soft layered chapati. This recipe is unique in that it involves a special technique to create layers in the chapati, resulting in a flaky and delicious Indian flatbread. Follow along with the step-by-step instructions to learn how to make this mouthwatering dish at home. Let's get started!
What Is Soft Layered Chapati?
- Soft layered chapati is a traditional Indian flatbread that is known for its flaky, soft layers and delicious taste. This recipe combines simple ingredients like wheat flour, salt, and water, with a touch of olive oil to create a dough that is kneaded, rested, and rolled into flaky, layered chapatis. The unique seasoning and method of folding the dough create the soft, succulent layers that make this chapati a popular choice for many Indian meals.
Why You'll Love Soft Layered Chapati?
- Amazing Texture: The soft layered chapati has a light and flaky texture that makes it a delightful addition to any meal. The layers give it a unique and appealing look, adding a touch of elegance to your dining experience.
- Healthy Option: Unlike traditional chapatis, the soft layered version requires less oil, making it a healthier choice. It's a great way to enjoy a staple Indian food while keeping your health in check.
- More Digestible: The layers in the chapati make it easier to digest, making it a good option for those with sensitive stomachs. Plus, the use of wheat flour adds a dose of fiber, promoting better digestion and overall gut health.
- Versatile: Soft layered chapati is a versatile bread option that pairs well with a variety of dishes. Whether you're enjoying it with a hearty curry or using it as a wrap for your favorite fillings, this chapati adds a delicious touch to any meal.
- Appealing Presentation: The layered look of the chapati is visually appealing, making it a great choice for when you want to impress guests or simply elevate the presentation of your homemade meals.
- Easy to Make: Despite its layered appearance, making soft layered chapati is a straightforward process that can be easily mastered. With the right technique and a bit of practice, you can enjoy this delightful bread in no time.
Ingredients for Soft Layered Chapati
- Wheat Flour: This is the main ingredient used to make the dough for the chapati. It provides the base and structure for the chapati.
- Salt: Adds flavor to the chapati dough and enhances the overall taste.
- Water: Helps in kneading the dough and binding all the ingredients together.
- Olive oil: Adds moisture and helps in making the chapati soft and layered.
- Ghee or oil: Used for applying on the chapati while rolling and cooking, which adds richness and flavor to the chapati.
These key ingredients work together to create a soft and layered chapati that is perfect to pair with your favorite korma.
How To Make Soft Layered Chapati
To make soft layered chapati, follow these steps carefully:
- In a large bowl, mix 2 cups of wheat flour and 1/2 tsp salt. It's important to mix these dry ingredients well to ensure the flavor is evenly distributed throughout the dough.
- Add water as needed and knead the dough. Knead it for at least 5 minutes to develop the gluten and achieve the right texture.
- After kneading, apply 1 tbsp of oil and knead for an additional 5 minutes or until the dough becomes soft. This step is crucial for achieving the desired softness in the chapati.
- Cover the dough and let it sit for 30 minutes. This resting period allows the gluten to relax, making it easier to roll out the chapati later.
- After 30 minutes, knead the dough well once again and then divide it into medium-sized balls.
- Roll out the chapati and apply oil or melted butter between each layer. This is the key step for creating the soft layers in the chapati.
- Cook the chapati on a hot pan, flipping it over and applying oil as needed. Proper cooking is essential to ensure the chapati puffs up and becomes soft and flaky.
By following these steps, you'll be able to make delicious soft layered chapati that pairs perfectly with your favorite korma.

Serving Suggestions
- Pair with Curries: Soft layered chapati goes well with a variety of curries such as butter chicken, paneer tikka masala, or chana masala. The flakiness of the chapati complements the rich and spicy flavors of the curry, creating a delicious and satisfying meal.
- Accompany with Dips: Serve the soft layered chapati with a selection of savory dips like mint chutney, mango chutney, or garlic yogurt sauce. The combination of the soft chapati and flavorful dips adds an extra dimension to your dining experience.
- Enjoy with Pickles: For a burst of tangy and spicy flavor, pair the chapati with traditional Indian pickles such as mango pickle, lime pickle, or mixed vegetable pickle. The pickles will add a punch of flavor to every bite of the chapati.
Tips for Making Soft Layered Chapati
- Preparation Duration: The preparation time for making soft layered chapati is relatively quick and easy. After kneading the dough and letting it sit for 30 minutes, it takes only a few minutes to roll out the chapati and cook it on the Tawa.
- Kneading Technique: To achieve soft layered chapati, it's crucial to knead the dough well. After adding the oil, knead the dough for an additional 5 minutes to ensure it becomes soft and pliable.
- Layering Process: When rolling out the chapati dough, be gentle and roll it into a thicker circle than a regular chapati. The layering technique involves folding the dough and then rolling it out again, creating layers that will result in a flaky texture.
- Cooking on Tawa: To cook the chapati, start on high heat to get the Tawa hot and then reduce the heat to low before placing the chapati on it. Cooking for a few seconds on each side and then flipping the chapati over, helps to achieve the desired texture.
- Hot Tawa: Make sure the Tawa or pan is hot before placing the chapati on it. This ensures that the chapati cooks evenly and develops those desirable little air bubbles.
- Garnishing for Presentation: Lastly, before serving, consider garnishing the soft layered chapati with some ghee or a sprinkle of fresh coriander for a beautiful and appetizing presentation. Good presentation makes the dish more inviting and enjoyable.
Variations for Soft Layered Chapati
- Mixture of Flours: You can experiment with different flours like adding a mixture of wheat flour and all-purpose flour or adding a small amount of gram flour to the dough for a unique taste and texture.
- Herbs and Spices: Add some chopped herbs like coriander or mint, or spices like cumin or chili powder to the dough for a flavor-packed chapati.
- Yogurt or Milk: Instead of water, you can use yogurt or milk to knead the dough for a richer and creamier chapati.
- Sweet Chapati: For a sweet twist, add a little sugar and some cardamom powder to the dough for a delightful sweet chapati.
- Nutty Flavors: You can also add finely chopped nuts like almonds or cashews to the dough for a nutty and crunchy chapati.
- Vegetable Puree: Experiment by adding vegetable puree like spinach or carrot puree to the dough for a colorful and nutritious chapati.
By experimenting with these variations, you can create a variety of soft layered chapati and elevate your dining experience with unique flavors and textures.
How to Store Soft Layered Chapati
- Keep the Dough Fresh: After kneading the dough, cover it with a damp cloth or plastic wrap to prevent it from drying out. You can also store the dough in an airtight container in the refrigerator for up to 2 days.
- Store the Flour Properly: Keep the wheat flour in an airtight container in a cool, dry place to maintain its freshness and prevent any pests from getting into it.
- Protect the Olive Oil: Store the olive oil or any other oil in a dark, cool place and make sure the cap is tightly closed to prevent oxidation and maintain its quality.
- Maintain the Freshness of Cooked Chapati: If you have leftover chapati, store them in an airtight container or ziplock bag to prevent them from drying out. They can be stored in the refrigerator for up to 2 days.
- Prevent Moisture: When rolling the chapati, make sure the dough is not too wet, as excess moisture can cause it to stick together when storing.
- Properly Seal the Roti: When storing the cooked chapati, make sure they are properly sealed to maintain their softness and prevent them from drying out. Use parchment paper or wax paper between the layers to prevent them from sticking together.
Frequently Asked Questions (FAQs)
How can I make the chapati softer?
- To make the chapati softer, you can add a little more oil or ghee to the dough while kneading. This will help to keep the chapati moist and soft.
Can I use whole wheat flour instead of regular wheat flour?
- Yes, you can use whole wheat flour instead of regular wheat flour to make the chapati. It will make the chapati more nutritious and give it a slightly nuttier flavor.
What if I don't have a rolling pin?
- If you don't have a rolling pin, you can use a clean, smooth bottle to roll out the chapati dough. Just make sure to dust it with flour to prevent sticking.
Can I use a non-stick pan instead of a Tawa?
- Yes, you can use a non-stick pan instead of a Tawa to cook the chapati. Just make sure to heat it over low heat before cooking the chapati to prevent burning.
How can I prevent my chapati from turning hard?
- To prevent the chapati from turning hard, make sure to cover it with a clean kitchen towel or cloth after cooking. This will help to keep the chapati soft and moist.
Can I skip the step of applying oil while cooking the chapati?
- It's not recommended to skip the step of applying oil while cooking the chapati, as it helps to give the chapati its soft and flaky layers. However, you can reduce the amount of oil if you prefer.
Recipe Card
How To Make Soft Layered Chapati 2021-07-16 04:07:33

How To Make Soft Layered Chapati
Serves 3
Prep Time: 00:15
Cook Time: 00:20
Total Time: 00:35
Ingredients
- 2 cups Wheat flour
- 1/2 tsp or as needed Salt
- as needed Water
- 1tbsp Olive oil or any other oil
- to apply Ghee or oil
Instructions
- Firstly, in a large bowl take 2 cups of wheat flour and 1/2 tsp salt. mix well.
- Then add water as required and knead the dough.
- Knead it for 5 mins and then apply 1 tbsp of oil and again knead for 5 more minutes or until it becomes a soft dough as shown in the picture.
- Now cover it and let it sit for 30 minutes.
- After 30 mins, knead it well once again.
- Then divide the dough into 7 to 8 medium-sized balls.
- Roll the ball in the palms of your hand gently.
- Then dust it with flour and place the dough on the rolling board and with the help of a rolling pin roll into a 6 to 7“circle.
- Take 1 teaspoon oil or melted butter and pour over roti, with the fingers spread oil or butter evenly over the surface of the roti.
- Fold the roti as shown in the picture and again spread 1/4 tsp of oil over the folding and fold again.
- Then dust it with the flour and place the square dough back on the rolling board and roll, while rolling do not press down too hard as this will cause the layer to stick together and the roti will not be flaky, roll the roti into the desired size. Layered roti rolled thicker than the normal chapati.
- Meanwhile, heat a Tawa or heavy-bottomed pan over high heat.
- When the Tawa becomes hot, reduce the heat to low, place the chapati on the hot Tawa and cook it for 20 seconds or until you see some small air bubbles on the chapati.
- Now flip over and cook for a few seconds.
- After a few seconds, turn the heat to high and press the chapati gently. Pour 1 tsp oil over the roti.
- Again flip over and apply some oil and cook until it puffs up as shown in the video.
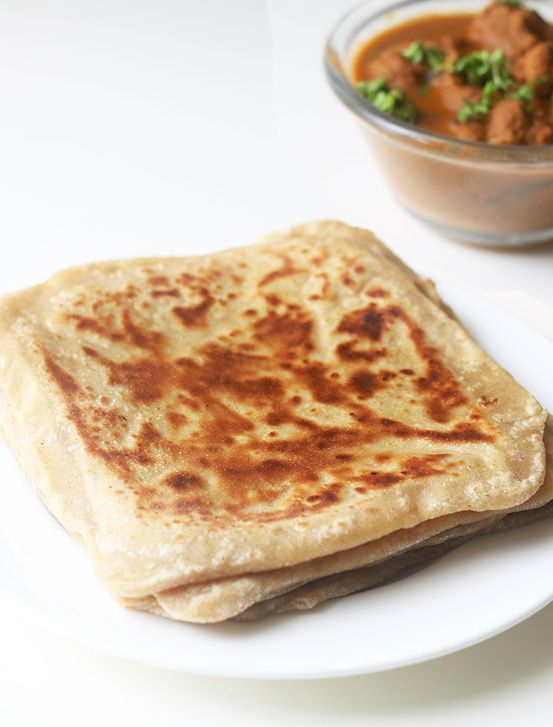
- Once both sides of the roti are cooked, remove the chapati from the heat and serve with your favorite korma.
By Santhi Therese
The Indian Claypot
Step-By-Step Instructions:
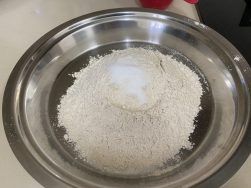
Firstly, in a large bowl take wheat flour and salt.
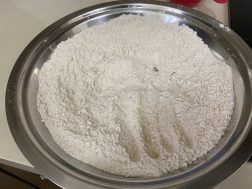
mix well.
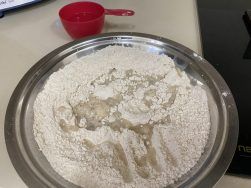
Then add water as required
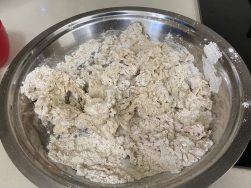
and knead the dough.
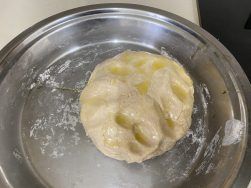
Knead it for 5 mins and then apply 1 tbsp of oil and again knead for 5
more minutes or until it becomes a soft dough as shown in the picture.
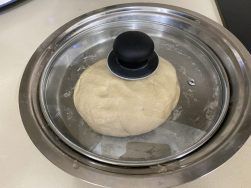
Now cover it and let it sit for 30 minutes. After 30 mins, knead it well once again.
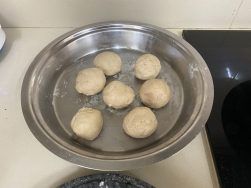
Then divide the dough into 7 to 8 medium-sized balls. Roll the balls
in the palms of your hand gently.
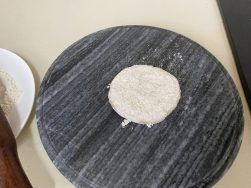
Then dust it with flour and place the dough on the rolling board and with the help
of a rolling pin roll into a 7 “circle.
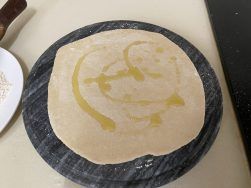
Take 1 teaspoon oil or melted butter and pour over roti,
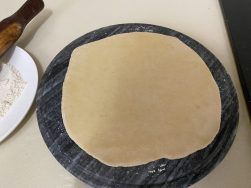
with the fingers spread oil or butter evenly over the surface of the roti.
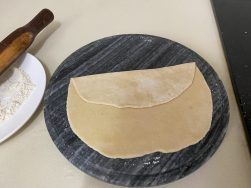
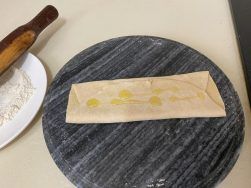
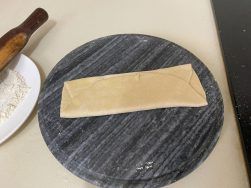
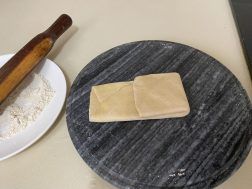
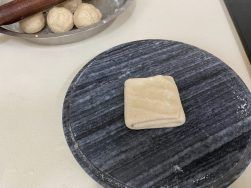
Fold the roti as shown in the pictures.
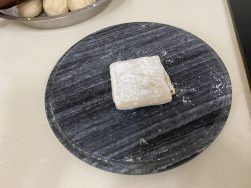
Then dust it with the flour and place the square back on the rolling board
and roll, while rolling do not press down too hard as this will cause the layer
to stick together and the roti will not be flaky,
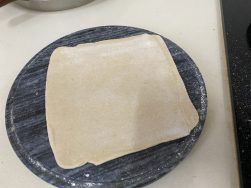
roll the roti into the desired size.
Meanwhile, heat a Tawa or heavy-bottomed pan over high heat. When the Tawa becomes hot, reduce the heat to low, place the chapati on the hot Tawa and cook it for 20 seconds or until you see some small air bubbles on the chapati. Then flip over and cook for a few seconds. After a few seconds, turn the heat to high and press the chapati gently. Then pour 1 tsp oil over the roti. Again flip over and apply some oil and cook until it puffs up as shown in the video. Once both sides of the roti are cooked, remove the chapati from the heat and serve with your favorite korma.
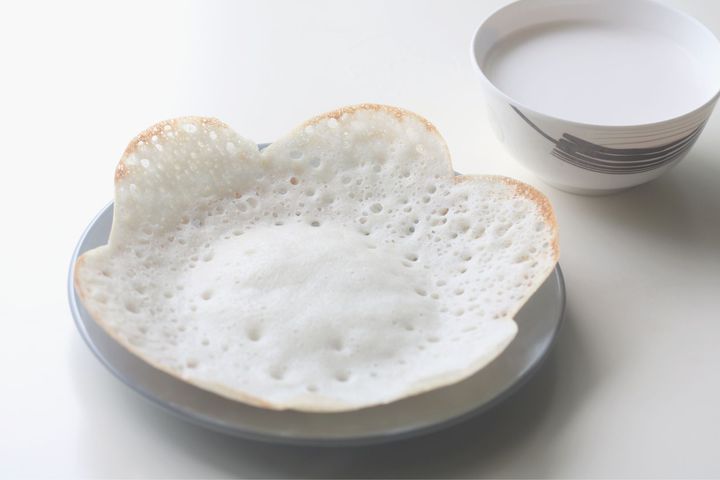
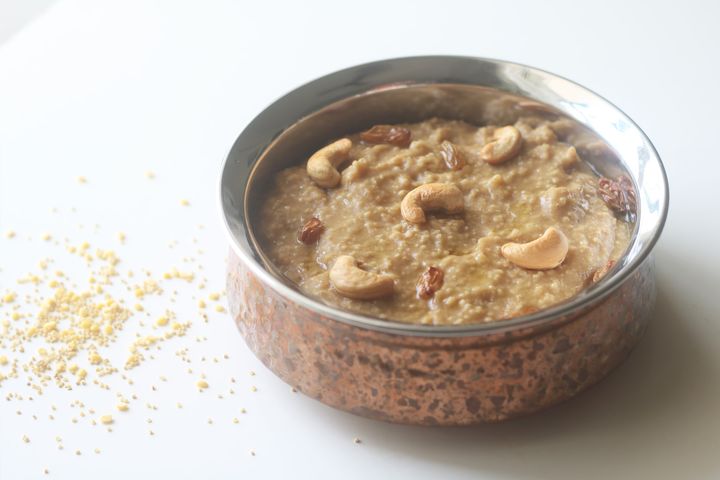
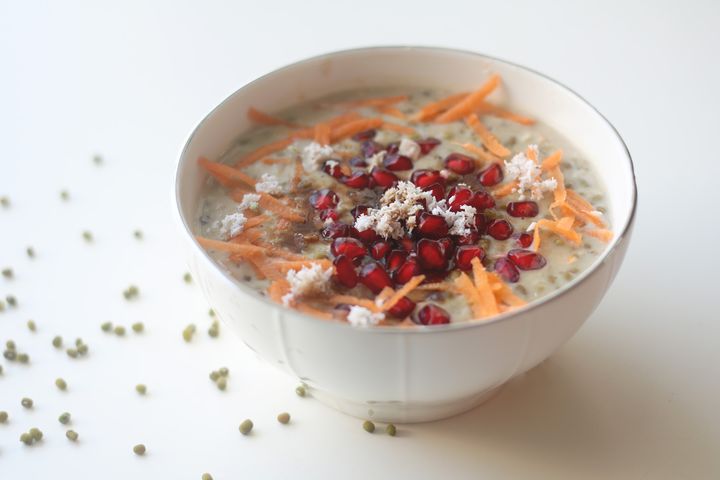
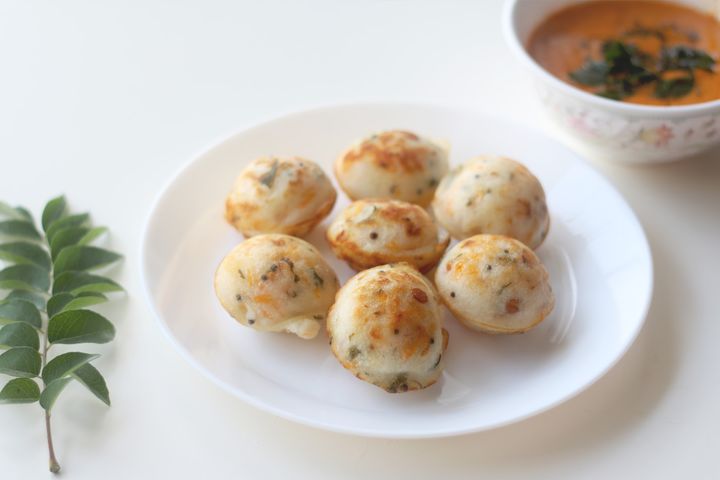
You may also like my other Healthy Breakfast posts and recipes like Appam Recipe, Millets Pongal /Foxtail Millet Sweet Pongal, Mung Bean Porridge, Kara Kuzhi Paniyaram with Idli/Dosa Batter, Oatmeal Brownie, Aval Payasam, Ragi Sweet Kozhukattai, Ragi Paal Kozhukattai, Oat and Honey Chewy No-Bake Granola Bars, Vendhaya Kali, Strawberry Apple Smoothie, Aval Pongal Recipe, Homemade Granola Recipe, Adai Dosa Recipe, Ragi Puttu, Green Gram Payasam/Kheer, Whole Wheat Bread Recipe, Kavuni Arisi Pongal, Vegan Banana Oatmeal Cookies, Homemade Peanut Butter .
