Kara Sev Recipe
If you’re craving for some spicy and crunchy snack that is perfect for a nice rainy evening? Then you will love this snack recipe!

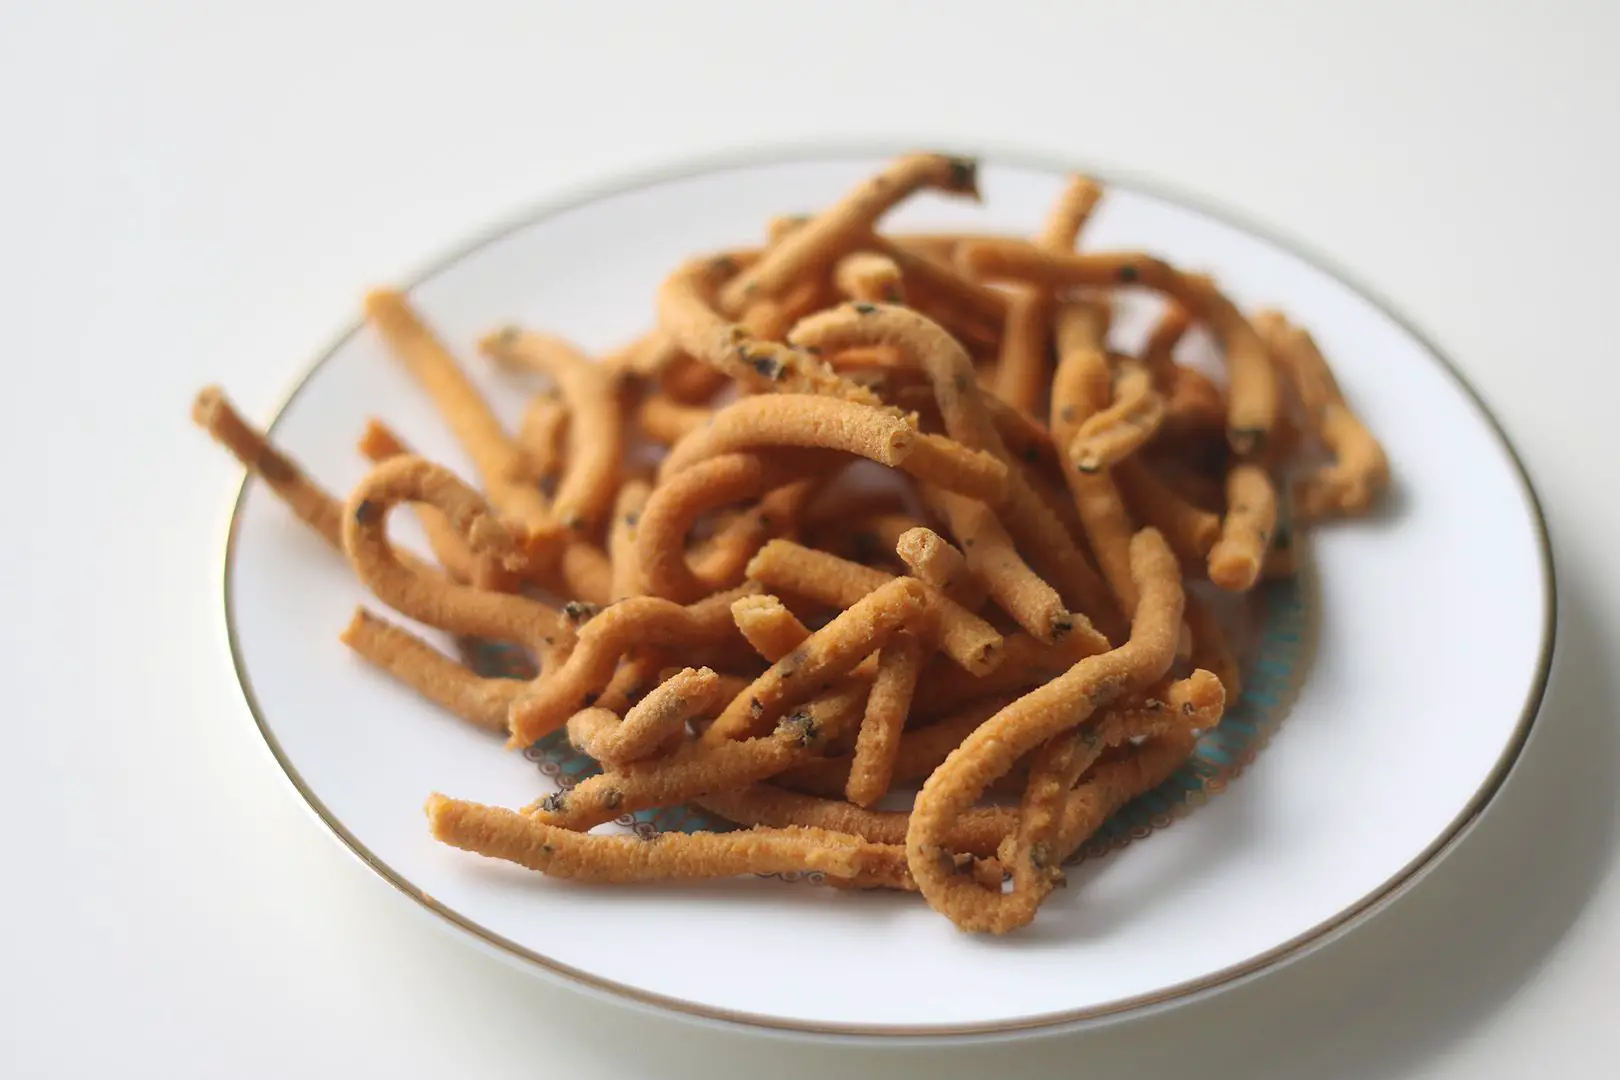
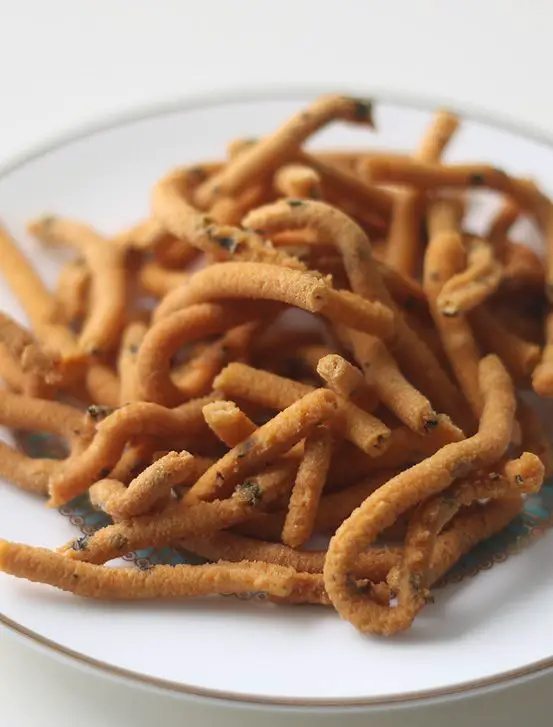
Welcome to The Indian Claypot! Today, we are excited to share with you a delicious recipe for Kara Sev. This popular Indian snack is known for its crispy texture and flavorful spices. Follow our step-by-step instructions to create this unique and savory treat at home. Whether you're a fan of traditional Indian snacks or looking to try something new, this Kara Sev recipe is sure to delight your taste buds.
If you’re craving for some spicy and crunchy snack that is perfect for a nice rainy evening? Then you will love this snack recipe! This snack is also perfect for times when you’re stuck at home with only a few ingredients! Serve this up with some hot chai on the side and you’ve got yourself a delicious evening platter! So try this pepper kara sev recipe out and don’t forget to share your comments! Enjoy!
What Is Kara Sev Recipe?
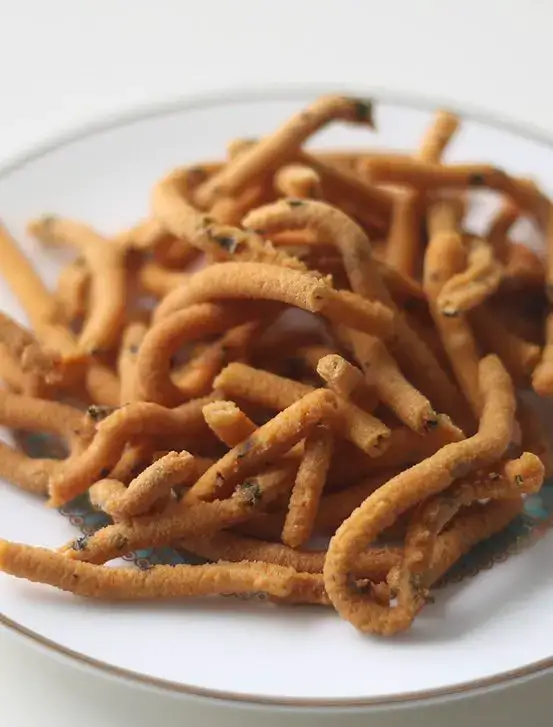
- Kara Sev is a popular Indian snack that is known for its crunchy texture and flavorful taste. This recipe combines besan flour, rice flour, and a unique blend of Indian spices to create a delicious snack that is perfect for any occasion. The addition of black pepper, cumin seeds, and garlic gives the Kara Sev its distinct taste, while the hot oil and butter add richness to the dough.
- The end result is a savory and spicy snack that is perfect for enjoying with tea or as a part of a festive meal. Overall, the Kara Sev recipe is a delightful combination of succulent main ingredients with Indian spices and unique seasoning, making it a must-try for anyone who loves Indian cuisine.
Why You'll Love Kara Sev Recipe?
- Irresistible Crunchy Texture: Kara Sev has a delightful, crispy texture that makes it a perfect snack to enjoy with tea or as a quick bite on the go.
- Healthy Besan Flour: Besan flour, the main ingredient of Kara Sev, is rich in protein and fiber, making it a healthier option compared to other snacks.
- Gluten-Free Option: With the combination of besan flour and rice flour, Kara Sev becomes a gluten-free snack, suitable for those with gluten intolerances.
- Spiced Flavor Profile: The black pepper, cumin seeds, and red chilli powder in Kara Sev not only add a burst of flavor but also offer various health benefits, such as improving digestion and boosting metabolism.
- Low Fat Content: By using minimal butter and frying the Kara Sev in hot oil, you can enjoy the snack with reduced fat content compared to other deep-fried options.
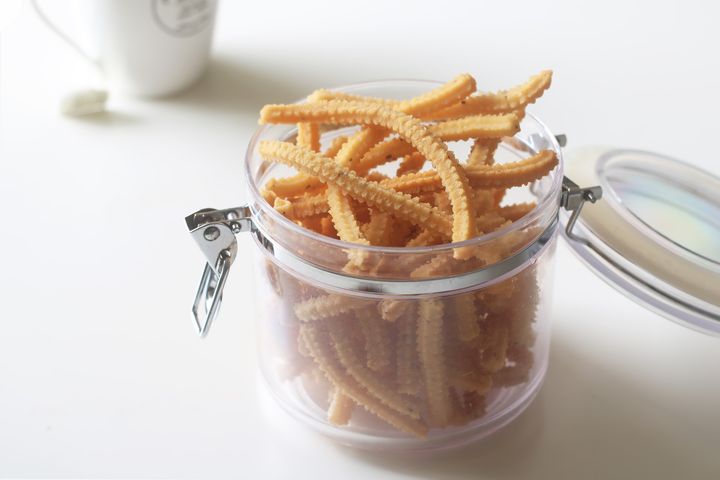
- Easy to Store and Enjoy: Once prepared, Kara Sev can be stored in an airtight container, making it a convenient and tasty snack to have on hand whenever hunger strikes.
Ingredients for Kara Sev Recipe
- Besan Flour: Also known as gram flour, it forms the base of the recipe and provides a nutty and earthy flavor to the Kara Sev.
- Rice Flour: Adds a light and crispy texture to the snack, making it perfect for munching.
- Black Pepper Corns: Adds a subtle heat and a pungent flavor to the Kara Sev, giving it a delicious kick.
- Asafoetida Powder: Enhances the overall flavor of the Kara Sev and adds a unique and distinct taste to the snack.
- Cumin Seeds: Provides a warm and earthy aroma, along with a slightly nutty flavor to the dish.
- Garlic Pods: Adds a rich and strong flavor to the Kara Sev, giving it a savory and aromatic profile.
How To Make Kara Sev recipe?
- To make Kara Sev, start by crushing the pepper corns and garlic pods separately.
- Then, sieve the besan flour and rice flour into a wide bowl and add the crushed pepper corns, cumin seeds, salt, asafoetida, and red chilli powder. Mix well before filtering the garlic water and adding it to the flour mixture.
- Next, add hot oil and softened butter, followed by sprinkling some water and mixing to make a soft dough. Once the dough is ready, cover it with a wet cloth and heat oil in a pan.
- Using a murukku maker, press the dough into the hot oil and fry until golden brown. Remove the Kara Sev from the oil and let them cool before breaking them into small pieces and storing in an airtight container.
The key steps to highlight in this process are the proper mixing of spices and the consistency of the dough. These steps are crucial for achieving the perfect flavor and texture of the Kara Sev.
Serving Suggestions
- Complementary Sides: Kara Sev can be served with a variety of complementary sides such as coconut chutney, mint chutney, or even tomato ketchup for a flavorful twist.
- Pairing Recommendation: Pair the crispy Kara Sev with a hot cup of masala chai or a refreshing glass of buttermilk for a perfect snack or light meal.
- Complete Meal: For a complete meal, consider serving Kara Sev alongside sambar rice or rasam rice for a satisfying and filling dining experience.
- Versatile Snack: Kara Sev can also be enjoyed on its own as a snack, alongside a variety of nuts or mixed with other savory snacks for a delicious munching option.
- Healthy Option: Try serving Kara Sev with a side of fresh, sliced cucumbers, carrots, and tomatoes for a healthy and balanced meal.
- Variety: Experiment with different side dishes for your Kara Sev, such as yogurt-based dips or tangy tamarind chutney, to explore a range of flavors and textures.
Tips for Making Kara Sev Recipe
- Preparation Duration: The preparation for Kara Sev recipe usually takes around 15-20 minutes and cooking time takes around 20-25 minutes. It is important to have all the ingredients ready before starting the process to ensure a smooth and efficient cooking experience.
- Cooking Techniques: To achieve the perfect texture and taste, it is essential to fry the Kara Sev over medium-low heat. This will ensure that the sev cooks evenly and becomes crispy without burning. Additionally, using a murukku maker with a thenkuzhal murukku plate will help in creating the traditional shape and texture of the sev.
- Importance of Garnishing: Garnishing the Kara Sev with a sprinkle of red chili powder or sesame seeds not only adds a pop of color but also enhances the presentation and flavor of the dish. It is recommended to garnish the sev right before serving to keep it fresh and appealing.
- Storing the Sev: After making the Kara Sev, it is important to let it cool completely before breaking it into small pieces and storing it in an airtight container. This will help in preserving the freshness and crispiness of the sev for a longer period.
- Experiment with Flavors: Feel free to experiment with different flavors by adding ingredients such as curry leaves, ajwain seeds, or even grated coconut to the dough. This will give a unique twist to the traditional Kara Sev recipe and allow you to explore new and exciting flavors.
- Sharing and Enjoying: Kara Sev is a delightful snack that can be enjoyed with a cup of hot tea or coffee. Share it with friends and family, and savor the crispy, savory goodness of this homemade treat.
Variations for Kara Sev recipe
- Spicy twist: Add a pinch of garam masala or chat masala to the dough for an extra kick of flavor. Experiment with different combinations to find the perfect level of spiciness.
- Herbal infusion: Mix in some dried herbs like curry leaves, dried fenugreek leaves, or even dried mint leaves to add a refreshing herbal twist to the traditional Kara Sev recipe.
- Nutty crunch: Incorporate a handful of crushed nuts like cashews, almonds, or peanuts into the dough for a delightful nutty crunch in every bite.
- Cheesy indulgence: For a unique twist, add a sprinkle of grated cheese to the dough. The melted cheese adds a rich and indulgent flavor to the crispy Kara Sev.
- Zesty citrus: Zest a lemon or orange and mix it into the dough for a burst of citrusy flavor. The bright and tangy citrus notes will elevate the overall taste of the Kara Sev.
- Sweet and savory: Add a touch of sweetness by incorporating a spoonful of jaggery or a pinch of sugar to the dough. The hint of sweetness balances the spice and creates a delightful sweet and savory flavor profile.
How to Store Kara Sev Recipe
- Store in an airtight container: Once the Kara Sev has cooled down completely, transfer it into an airtight container to maintain its crispiness and flavor.
- Keep away from moisture: Moisture can make the Kara Sev lose its crunchiness, so make sure to keep it in a dry place.
- Use desiccants: If you live in a humid climate, consider adding desiccants like silica gel packets to the container to absorb any excess moisture.
- Refrigerate for longer shelf life: If you want to extend the shelf life of your Kara Sev, you can store it in the refrigerator. Just make sure to bring it back to room temperature before serving.
- Separate from other snacks: To prevent the Kara Sev from absorbing any unwanted odors or flavors, store it separately from other snacks or spices.
- Check for freshness: Periodically check the Kara Sev for any signs of staleness or spoilage, and discard if necessary to maintain quality.
Frequently Asked Questions (FAQs)
Can I adjust the spiciness of the Kara Sev?
- Yes, you can adjust the spiciness of the Kara Sev by adding more or less red chilli powder according to your preference. You can also add some extra black pepper for a spicy kick.
What if I don't have a murukku maker?
- If you don't have a murukku maker, you can use a piping bag with a star-shaped nozzle to make the Kara Sev. Simply pipe the dough into the hot oil in the same circular motion.
Can I make the Kara Sev ahead of time?
- Yes, you can make the Kara Sev ahead of time and store it in an airtight container. It stays fresh for up to 2 weeks when stored properly.
How do I know if the oil is hot enough for frying?
- You can test the oil by dropping a small piece of dough into it. If it sizzles and rises to the top, the oil is ready for frying the Kara Sev.
Can I use ghee instead of butter?
- Yes, you can use ghee instead of butter for a richer flavor. Just make sure to adjust the quantity according to your preference.
What should I do if the dough is too dry?
- If the dough is too dry, sprinkle some more hot oil or water and continue mixing until it reaches a soft, pliable consistency.
Recipe Card
Kara Sev Recipe 2020-04-19 02:43:37
Kara Sev Recipe
Serves 4
Prep Time: 00:10
Cook Time: 00:20
Total Time: 00:30
Ingredients
- 1 cup Besan Flour
- 1/2 cup Rice Flour
- 1 tsp Black Pepper Corns
- 1/4 tsp Asafoetida Powder
- 1 tsp Cumin Seeds
- 1 tsp Red Chilli Powder
- to taste Salt
- 4 Garlic Pods
- 10 grams Butter
- 1 tbsp Hot Oil
- as needed Water
- enough to fry Oil
Instructions
- Crush the pepper corns by using mortar pestle until coarsely.
- Crush the garlic pods and then add some water and mix well. Keep it aside.
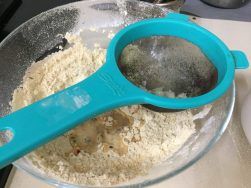
- Sieve the flours separately.
- In a wide bowl, add the besan flour and rice flour and mix well.
- Then add crushed pepper corns, cumin seeds, salt, asafoetida and red chilli powder and mix well until combined.
- Filter the garlic water and pour that water over the flour and mix well.
- Then add hot oil and softened butter and mix well.
- Sprinkle some water and start mixing to make a soft dough and cover it with a wet cloth.
- Heat oil in a pan over medium heat.
- Place a thenkuzhal murukku plate in a murukku maker.
- Fill the mould with enough dough.
- When the oil is hot enough, reduce the heat to medium- low.
- Press the murukku press in a circular motion. Don't overlap, just a single round is enough.
- Fry both sides evenly. When they turn golden brown, remove it from the oil and place them on a kitchen tissue.
- Repeat the same process for the leftover dough.
- Let them cool. As we made it in the shape of murukku, break it into small pieces. Store it in an airtight container.
By Santhi Therese
The Indian Claypot
Step-By-Step Instructions:
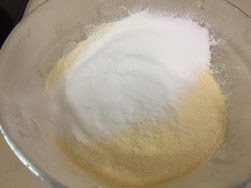
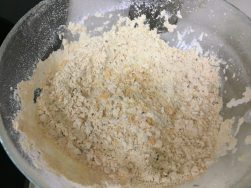
sieve the flours separately.
In a wide bowl, add the besan flour and rice flour and mix well.
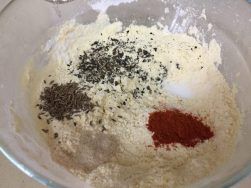
Then add crushed peppercorns, cumin seeds, salt, asafoetida and
red chili powder and mix well until combined.
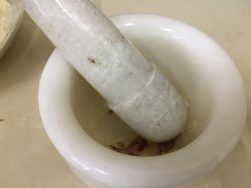
Further, crush the garlic pods
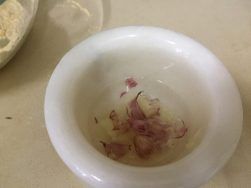
and then add some water and mix well.
filter the garlic water
and pour that water over the flour and mix well.
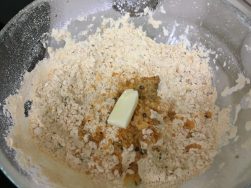
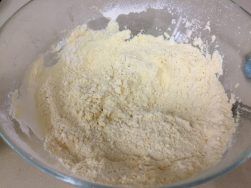
Then add hot oil and softened butter and mix well.
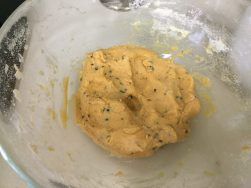
Also, Sprinkle some water and start mixing to make a soft dough and
cover it with a wet cloth.
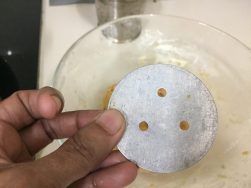
Meanwhile, heat oil in a pan over medium heat. Place a thenkuzhal murukku plate in a murukku maker.
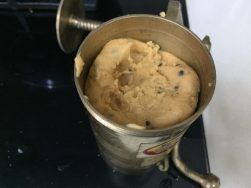
Then fill the mould with enough dough.
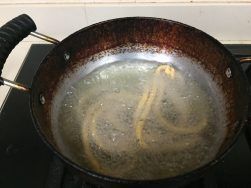
When the oil is hot enough, reduce the heat to medium- low. Press the
murukku press in a circular motion. Don’t overlap, just a single round is enough.
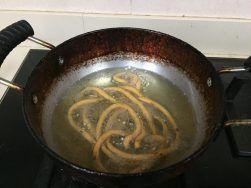
Fry both sides evenly.
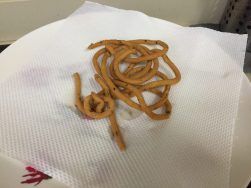
When they turn golden brown, remove it from the oil and place them
on a kitchen tissue. Repeat the same process for the leftover dough. Let them cool.
As we made it in the shape of murukku, break it into small pieces.
Store it in an airtight container.